Watch the Video Below:
*Make sure to purchase a Light Panel from OSAAP COMMERCE before proceeding*
1. From the homepage of BlueMobile, select the Projects tab at the bottom.
2. Select the project you want, then either select an existing board or create a new one.
3. If you are creating a board, go through the creation process until you reach the Upload Media screen. If a board has already been created, go to the Media tab at the top and select Upload More Media.
4. Select Scan Image, and then proceed through the pages that appear.
5. Plug in your light panel from OSAAP COMMERCE into a wall outlet and set on a flat surface. Make sure to work in an area with no direct sunlight or shadows.
6. Lay your tools on top of the light panel, ensuring that the tools are at least 1 inch apart from each other and the edge of the light panel. For tall parts, make sure to take a picture separately while putting it in the center of the light panel.
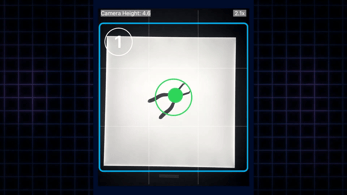
7. Initiate Scan Image Capture and hold the phone two feet above the light panel. Wait for Light Panel Detection, and then slowly raise the phone until it is 4.5 feet above the light panel. Center the light panel in the capture box and hold the phone steady. Make sure the entire light panel is within the capture box.
8. After the image is taken, add an image name and then select Done. If you would like to retake a picture, select Re-Capture. You can also click Save and Take Another Image to continue scanning.
9. Scanned images are immediately uploaded to your project for the design team to review. All images are saved in the BlueManager cloud and can be viewed as needed.