Typical Problems Include
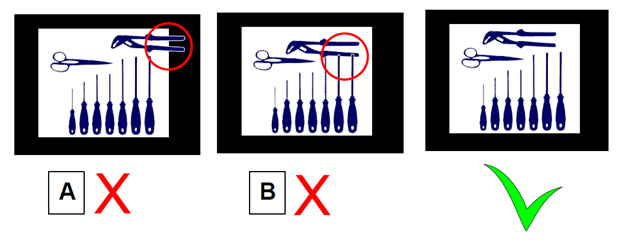
- Operator zoomed in too much and did not include the frame of the Light Box in the picture.
- Operator allowed something unintended to cover the frame of the Light Panel
- Part is too large for the Light Box and overhangs the frame on the Light Panel
- Clear plastic part on the Light Box did not scan correctly.
- A good example of this is a clear plastic handle of a screwdriver
- Operator did not turn the Light Box on
- Tall parts require the camera to be very straight
To test that your Light Panel is providing images that scan into the correct size we recommend using a test object. For example snapping an image of a ruler and using it to reference that the image scan is measuring correctly.
Taking a Photo Correctly
- Be sure the camera is flat - or - 90 degrees from the light panel surface
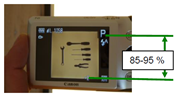
- Zoom in on the light panel and fill 85% to 90% of the camera window with the light panel. Ensure that the frame of the light panel is visible in the picture
- Make sure all tools are sitting on the light panel's lit surface and not overlapping.
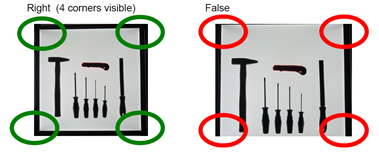
- All 4 corners should be visible in the photo
Light panel photos should have a minimum distance of 1.5 M (4.9 feet). However it is important to consider that the OSAAP scanning process is most commonly used with tools that are less than 1 1/2" thick (1.5" is 2.5% of 4.9') which will result in very little shadowing. As your parts get thicker than 1 1/2" we recommend applying a 2X general-rule: increase the distance between the camera and the light panel by 2X the part thickness for parts thicker than 1 1/2".
What does a good image scan look like?
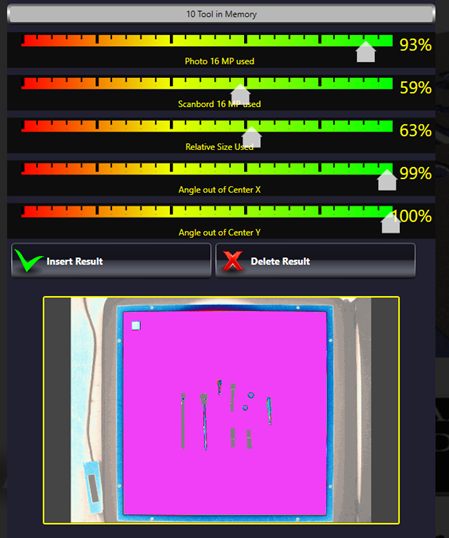
- Photo 16 MP used should be <90%
- Scanbord 16 MP used should be <50%
- Relative Size used should be <50%
- Relative Size used should be <97%
- Angle out of Center Y should be >97%, <102%