OSAAP America has a free CAD design software to aid in the design of shadow boards. This article is meant to walk customers through the first step of creating a new board design in this software.
Customers have two choices when originally creating a shadow board design. They can either give our design team the necessary files and information to custom design a board or they can download our free CAD software and design the board themselves. Both of these processes begin in the web portal.
Please remember we offer free design services if you upload images taken from our Light Panel to the web portal (see working with CAD files if you have .dwg, step, dxf or other files).
If you choose to design your own Foam Inlay or Shadow Board, the first step in the OSAAP workflow is to create your Board in our free CAD software: Blue Shadow.
Tutorial Video:
Written Tutorial:
-
Step #1: Start Project
Click the "New" ICON on the top left corner of the home page in Blue Shadow.
-
Step #2: Name Your Project and Board

-
Step #3: Material Selection
Click the pull-down arrow to see available materials: foam and plastic are available at this time.NOTE: If you would like to learn more about these options contact your sales associate.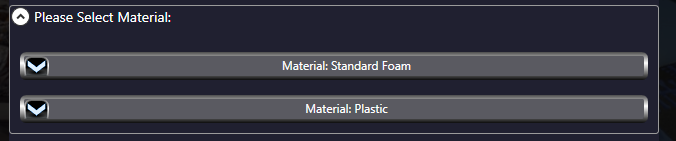
-
Step #4: Select the Material Thickness You Require
Select the drop down arrow associated with the material you chose to see your thickness options.1" Plastic is also available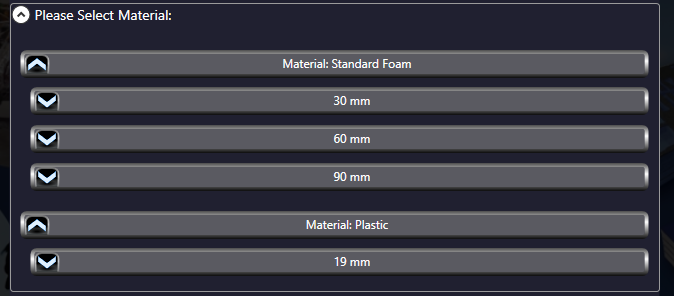
-
Step #5: Board Color Selection
Once you have selected your preferred material and thickness the next step is to select what color you want your board to be.All colors offer the same properties other than ESD. If you would like to learn more about ESD foam visit this link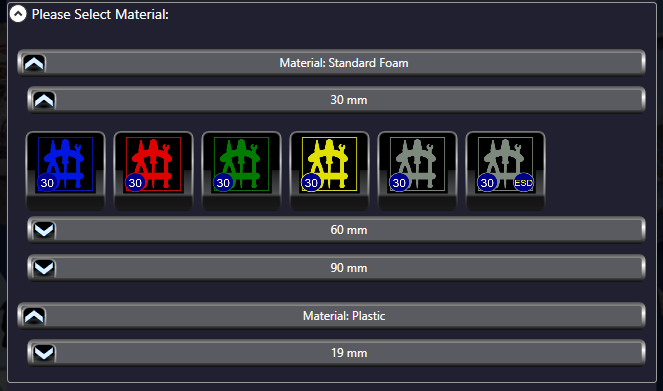
-
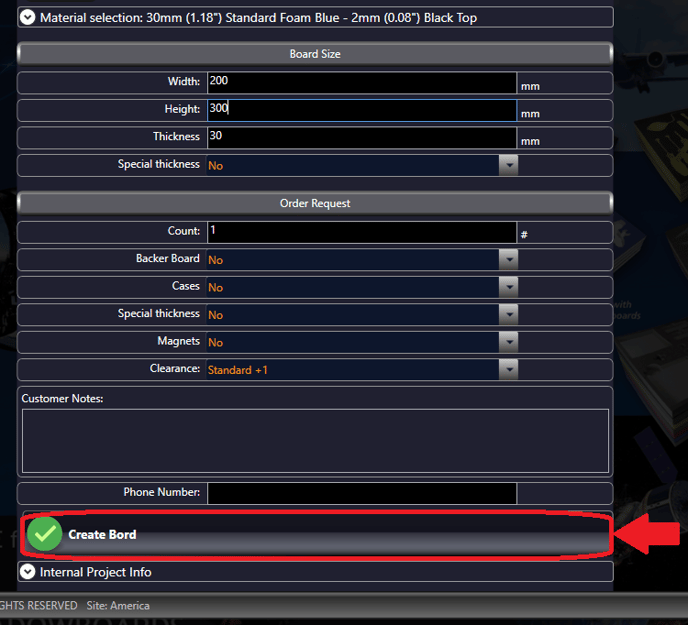
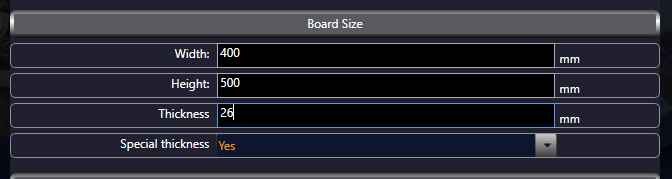
Step #6: Board Size
Enter the Width and Depth of your Foam Inlay or Shadow Board.If your project requires your board to have a thickness other than 30mm select the drop down menu associated with "Special Thickness" and change the prompt to "Yes". Once the prompt has been switched to "Yes" you will have the ability to edit the thickness.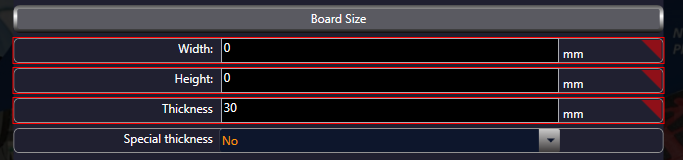
-
Step #7: Order Request
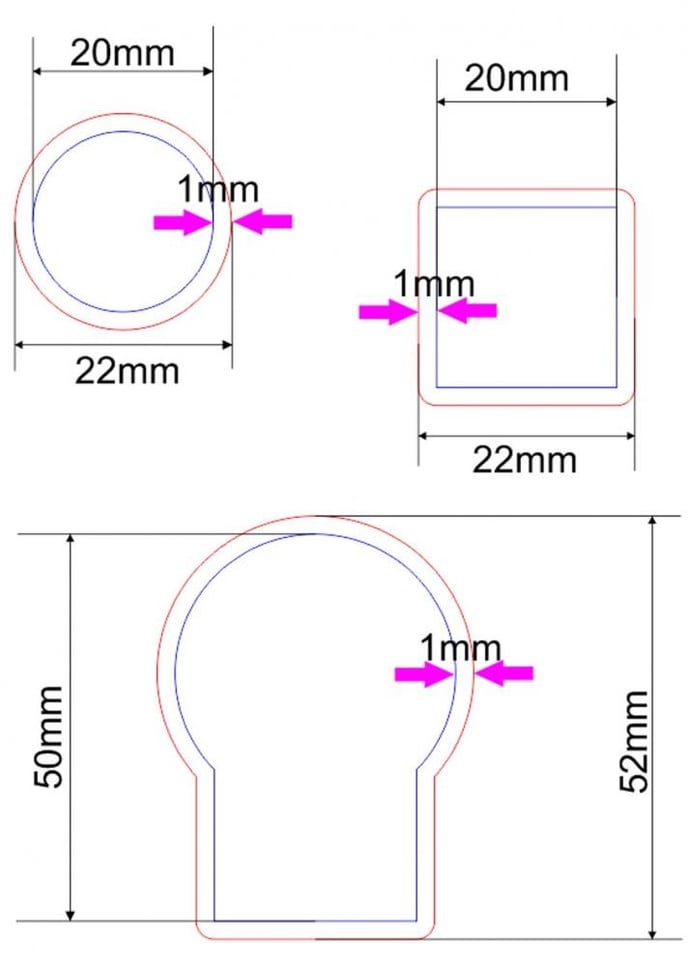
In this section you are provided the option to add addition content to your board.Use the drop-down boxes to add your additional preferences for your Foam Inlay or Shadow Board project.**These are essential selections needed to quote and manufacture your project correctly**The "Clearance" option is an essential setting in making sure your board is manufactured correctly. The options are: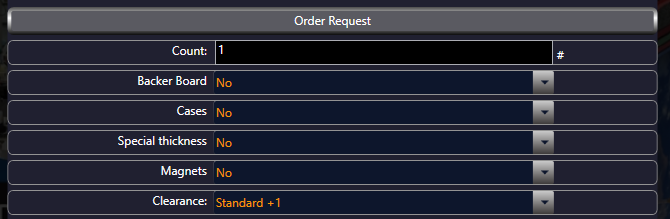
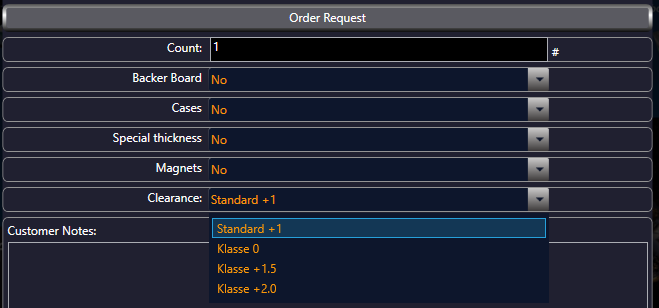
- Standard +1: We add 1mm to the perimeter of the cut-out to ensure a slip fit for the parts. This setting is recommended for all foam that will be used on a flat surface (e.g. in a tool drawer).
- Klasse 0 (Klasse is German for Class): We add no tolerance space to the perimeter of the cut-out to ensure a press fit for the parts. This setting is recommended when the foam will be mounted and the tools must be held firmly in place by the foam.
- Klasse +1.5 (Klasse is German for Class): We add 1.5mm to the perimeter of the cut-out to ensure a slip fit for the parts. This setting is recommended for all foam that will be used on a flat surface (e.g. in a tool drawer).
- Klasse +2.0 (Klasse is German for Class): We add 2mm to the perimeter of the cut-out to ensure a slip fit for the parts. This setting is recommended for all foam that will be used on a flat surface (e.g. in a tool drawer).
The image below displays the Standard +1 clearance application to the milling process.
NOTE: If you would like to learn more about the other board content customization contact your sales associate.
8. Step #8: Complete Board
Fill in the remaining fields and finalize by clicking the "Create Bord" button.